Category Archives: Sports

CHANGE YOUR (WORKOUT) SURFACE, CHANGE YOUR BODY

To fast-track your results, switch up the ground beneath your feet.

Here, how the ground beneath you impacts your fitness routine — and how to best spend your time on each.

1

Cross-train in water

Traditionally, aquatic exercise has been thought of as a rehabilitation tool, however, more and more you are seeing water-based training as a cross training tool that can add variety without the impact and pounding of land based training,” says Michael J. Ryan, Ph.D., Associate Professor of Exercise Science at Fairmont State University.

Water is 800 times thicker than air, he says. “That thickness provides continuous three-dimensional resistance, requiring additional muscle activation.” Additionally, the buoyancy of water reduces your body weight — reducing, too, the likelihood of injuries.

2

Build strength and stability on sand

Sand can give you a great workout while lessening the blow of impact. “Running on soft sand strengthens the arches in your foot, increases ankle stability, and strengthens the muscles of the lower leg and hip stabilizers,” Ryan says. That’s because the ever-changing, uneven surface forces the neuromuscular system to constantly adjust — which means greater activation of muscles, increased force production, and a more significant arm drive, he explains.

Just remember: Sand can put stress on the calf and foot muscles, so start slow with a few sprints or short runs, Ryan suggests.

3

Gain speed on pavement

This hard, flat surface means a solid and predicable platform to push off of. “This allows you to run faster because less energy is absorbed by the surface,” says Ryan. “The predictability also makes it easier to keep a fast, steady pace.” And it’s not as much pounding as you may think: “Running on pavement puts less stress on the Achilles tendon when compared to softer surfaces.”

Just avoid high impact movements such as plyometrics, says Ryan. “Because less energy in absorbed by the pavement, those forces are transferred back to your body increasing the stress put on bones, muscle, and joints.”

4

Do plyometrics on grass

Beyond the physiological benefits — a change in scenery or the lack of pressure to PR — soft grass absorbs much of the impact forces of your exercise, says Ryan. Thus, it’s easier on your body when it comes to plyometrics. Grassy surfaces are also less stable, which fires up stabilizer muscles in the foot, lower legs, and core, he says.

As for your run? “After training on grass, many runners say they feel stronger when they return to the roads,” Ryan says. How come? “There is a greater cardiovascular cost running on grass compared to running the exact same speed on pavement,” he says. “If you can maintain the same pace, you will get a better workout. Most people slow down a bit on grass.”

5

Recover on trails

Trail running can be tough: Some trails are technical, peppered with rocks, logs, or tree roots — and many force you to slow down and pay attention to where you step, says Ryan. But this is exactly why a weekly trail run can benefit you. “Trail running often forces you to take shorter strides, which may lead to more efficient running mechanics when you return even surfaces,” says Ryan.

“Well-maintained dirt trails, cinder paths, and wood chip trails are some of the best places to run. They usually provide an even surface that is soft enough to reduce impact forces while still allowing you to maintain a fairly fast pace.”


For fukll article by Cassie Shortsleeve, visit http://q.equinox.com/articles/2015/04/surface-workout?emlcid=EML-newsletters_2015_04_15&emmcid=EMM-0415QWeekly4152015

VIDEO: WHY I TRAIN PREGNANT


Like so many expectant mothers who exercise, Linda Baltes deals with criticism. But she hasn’t let it stop her.

Despite the near-total eradication of gender lines in fitness, to this day, when a pregnant woman walks into the gym, eyebrows inevitably raise.

“When you’re training pregnant, you get a lot of people questioning you,” says Linda Baltes, who is expecting her first child later this month. “They’re questioning whether you’re doing this because you’re vain.”

For Baltes, it made perfect sense to continue training through her pregnancy. The Santa Monica-based triathlete—who serves in the Air Force Reserves and works for a molecular diagnostics company—has been active and athletic her entire life. But that didn’t make her immune to this specific brand of fit-shaming.

“Pregnancy is not a disease,” says Jacques Moritz, M.D., director of the division of gynecology at New York City’s Mount Sinai Roosevelt and Mount Sinai St. Luke’s. “It’s a condition. As long as one doesn’t go overboard, pregnant women not only should, but are encouraged to work out.”

Watch the video above to glimpse Baltes’ prenatal routine and hear why she believes that fitness has a place of utmost importance in these nine months of her life, and even more so in the months and years that follow.

For full article please visit http://q.equinox.com/articles/2015/02/pregnancy-workout-video?emlcid=EML-newsletters_2015_02_11&emacid=EMA-QWeekly-02112122015.  Article written by Sheila Monaghan

FIT BODY SECRETS: ANKLE MOBILITY

Master trainer Josh Stolz shows you how focusing on forgotten areas unlocks a fitter physique.

“Let’s start with ankle mobility—your foot and ankle contain a relatively large percentage of bones in a relatively small area,” says Stolz, “so if there’s something that’s not moving correctly, it’s going to affect the rest of your body. More specifically, your foot creates internal rotation up into your hip, which lengthens the glute and allows you to propel forward. So if you’re lacking mobility in your arch and foot, you’re going to limit the movement up the chain, and that’s when your body gets out of balance and overworks certain areas.”

Stolz’s approach to mobility training breaks down to three phases: Melt, mold, and move. For each phase, he employs specific tools, too. How he explains it:

Melt: “I’m going to melt the connective tissue – basically roll it, massage it, and reduce the adhesions. This smooths out and helps hydrate the tissue.”
The Tools: ROLL Recovery R8VYPER vibrating rollerSupernova
How They Help: The R8 may resemble a recycled Rollerblade, but it’s much more hardcore. “This tool allows you to move the tissue in multiple directions—I can rotate, I can add friction—and I can increase or decrease the pressure.” The VYPER vibrating roller is another gadget garnering serious buzz. “Vibration is being researched, but it is purported to increase range of motion and bone density. You can use different settings, too: 1 would be for recovery, post-workout, and 2 and 3 would be a faster movement better suited for pre-workout.” The Supernova is like a lacrosse ball for masochists, but Stolz likes it because of the notches, which allow you to create changes by manipulating your skin.

Mold: This phase furthers the hydration; Stolz favors the analogy of a sponge: “If I drop a sponge in water, it soaks up a certain amount of water. But if I squeeze the sponge, it pulls in more fluid, which, in terms of your body, hydrates tissue and also pulls in nutrients and oxygen.”
The Tool: Voodoo Bands
How It Helps: These bands, Stolz explains, offer an extremely easy way to increase range in motion—you can grip and pull, press, compress, and elongate tissue. They also help recycle and pull in fluid, oxygenate the tissue, and reduce pain by increasing the amount of nutrients coming into a specific area.

Move: “This is to stabilize the mobility you just obtained. In the Melt and Mold phases, you’ve increased range of motion and added more freedom of movement. Now, with Move, you want to be able to stabilize that extra range of motion to reduce injury risk.”
The Tool: Monster Bands
How It Helps: You’re likely familiar with this standard, but it’s incredibly useful for creating joint capsule flexilibilty, says Stolz. “Sometimes the joint capsule gets stuck, and that’s the root of the movement problem. But since you can’t stretch or foam roll in there, you need a way to manipulate.”

Stolz begins this three-part series with an ankle mobility workout, which he demonstrates in this slideshow. “These moves can be done as a set,” he says. “And it doesn’t hurt to do them every day.” For this workout’s Melt phase, Stolz recommends choosing one or two of the moves to start. And make sure you don’t rush. “When you’re rolling, think of covering one inch at a time for a minute or so,” says Stolz. “A regeneration day should be slow.”

Photographed by Mike Rosenthal; Gromming by Marina Gravini; Art Direction + Styled by Ashley Martin

R8 Ankle Mobility

Kneel, resting your left knee on a foam mat or yoga block, keeping your right knee bent 90 degrees. Using the R8 roller, slowly roll the length of your calf. This is best done in one-inch intervals, alternating directions (roll up and down, rotate and roll diagonally, and so on). Switch legs and repeat.


Sit with legs extended in front of you, palms flat on the floor. Place the VYPER above your right Achilles, then lift yourself slightly off the ground, resting your left ankle on your right. Slowly roll the VYPER from your Achilles to your calf; again, rolling in one-inch increments is best. Switch legs and repeat.


Retinaculum Ankle Mobility

On all fours, hands under shoulders and knees under hips, place the Supernova directly beneath the spot where your shin connects to your foot. Resting your leg there, slowly flex your toes up and down for one minute. Move the Supernova slightly up your leg and repeat. Add some circles of the foot in both directions. Switch legs and repeat.


Band-Assisted Ankle Mobility

Sit with legs extended in front of you, your left knee bent and left foot flat, palms flat on the floor. Secure the end of band around something solid, like the base of a machine, and loop around ankle and top of your right foot. Lift and rest your right calf on the handle of a kettlebell. Slowly flex your foot for one minute. Switch legs and repeat.


3D Flossing

Place a heavy weight plate on the ground in front of your feet (or use a slant board). Tightly wrap a Voodoo Floss band around your right calf and rest your right forefoot on the weight plate. Hinging from the waist, use both hands to wring or twist your calf as you lunge slightly forward until your knee is above your toes. Continue for one minute, moving up and down your calf. Quickly unwrap the band and repeat on opposite leg. Your leg should be wrapped for no longer than 90 seconds.


3D Band-Assisted Ankle Mobility

Place a heavy weight plate on the ground. Secure one end of a band to something sturdy, like a cable column or a machine, and wrap the other end around your right ankle. Step your left foot fully onto the weight plate, and rest your right forefoot on the weight’s edge. Hinge from the waist, holding onto something for support like an weight bench or 24-inch plyo box, and lunge slightly forward until your left knee is above your left toes. This movement should be in all planes of motion, so be sure to move forward and back, but also from side to side and in rotation in both directions. Continue for one minute and then switch legs.


Isotonic Weight Transfer

Prior to doing this move, perform an isometric contraction or hold in this position. Focus on driving the ball of the back foot into the ground with as much force as possible without moving the foot; these contractions should be held for about 5 seconds and repeated 2-3 times on each foot. Then, stand in a split stance, left leg forward, right leg back, keeping a slight bend in your knees. With a slight bounce in your step, lunge slightly forward to come up onto your right toes without lifting them off the ground, and back. This should be a very controlled movement. Repeat for one minute. Switch legs and repeat.


Dynamic Force Absorption

Stand in a split stance, left leg forward, right leg back, keeping a slight bend in your knees. With a slight bounce in your step, and without leaving this position, lunge slightly forward onto your left toes and then back, transferring your body weight between legs. Repeat for one minute and then switch legs.


For original post please see:  http://q.equinox.com/articles/2015/01/ankle-mobility


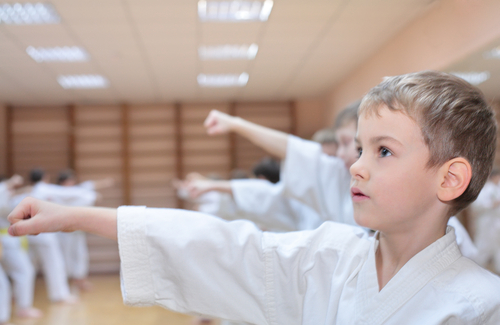
10 REASONS MARTIAL ARTS BENEFITS KIDS

  • In a culture that seems to glorify violence in everything from music to video games and television shows, the idea of enrolling your child in martial arts training classes doesn’t always seem like a good one. While martial arts-centered action films seem to be filled to the brim with violent behavior and gory injuries, you may be surprised to learn that martial arts’ training is actually very beneficial to kids. Like so many other things that Hollywood doesn’t always get right, martial arts isn’t quite the brutal, vicious pastime that it seems. In fact, these are 10 of the reasons why you may want to consider martial arts training for your kids.

    martialarts
    1. Fostering Self-Discipline – One of the central tenets of all forms of the martial arts is an absolute focus on self-discipline. Today’s kids are so accustomed to receiving instant gratification that lessons in self-restraint and discipline aren’t always easy to come by. Kids with a martial arts background, however, are continually reminded of how essential self-discipline is.
    2. Boosting Socialization Skills – Kids who don’t always thrive in highly social environments may find it easier to get to know people and make new friends when they’re in a room filled with peers who share a common interest. The kids on the playground may not always have much common ground, but devotees to the martial arts are able to get to know one another through shared pursuits. Partner-driven forms like jiu jitsu can also foster camaraderie, as they force kids to pair off and build their skills together.
    3. Encouraging Physical Activity – Limiting screen time is a great idea when it comes to getting kids off the couch and encouraging them to be more active, but it only goes so far viagra generika kaufen schweiz. Enrolling an inactive child in such a physically demanding pastime not only discourages the sedentary lifestyle she’s used to, but also gives her an enjoyable activity that inspires her to keep moving.
    4. Learning to Set and Achieve Goals – Most forms of martial arts are based around an accomplishment system of colored belts that signify the wearer’s degree of skill. When your child strives toward each new belt, he’s learning valuable lessons about setting and reaching his goals.
    5. Increased Self-Esteem – Confidence comes with achievement, so your child’s self-esteem level will get a boost with every new move he masters and every belt he earns. Kids who struggle with a low sense of self-worth usually become more confident as time progresses while they’re enrolled in a martial arts class.
    6. Instilling a Sense of Respect – Learning any martial arts style will require your child to show her instructor unflinching respect. Today’s kid culture doesn’t always include respect for authority, adults or those in advanced positions. When she goes to her karate or tae kwon do class, though, your child will be learning lessons in respect along with new moves.
    7. Encouraging Non-Violent Conflict Resolution – Thinking that martial arts instruction promotes violent behavior is justified if your only experience with the activity comes from television or movies. In fact, many defensive styles teach kids peaceful, non-violent conflict resolution skills and emphasize the importance of avoiding a physical altercation.
    8. Improving Listening Skills – In order to master the skills she’s being taught and advance through the belt ranks, your child will have to exercise superior listening skills. Kids who aren’t always adept when it comes to paying attention to what they’re told can benefit from the verbal instruction and one-on-one work in her dojo.
    9. Developing Teamwork Skills – Whether he’s breaking boards to get a new belt or sparring in a practice setting to master a new maneuver, there are few things that your child does in his martial arts classes that will be done on his own. Working together to learn new things and accomplish goals is an important life lesson for kids to learn, and instruction in the martial arts can help your child learn that lesson.
    10. Improvement in Other Areas of Life – The benefits of martial arts training don’t end in the dojo. The boost in confidence, increased fitness level and new cooperation skills will also help your child navigate the academic and social aspects of school, affect his behavior at home and have an all-around good influence on him as he develops into an adult.

    If you’re still concerned about encouraging violent tendencies or teaching your child to fight, it may be helpful to visit a few dojos/gyms in your area. Speak with the instructors, administrators and other parents to get an idea of how things operate, and hold off on forming a negative opinion of the martial arts until you’ve done a bit of exploratory research. You may even find that training is the perfect activity for your entire family to do together!

    Author: Kenney Myers - www.kenneymyers.com

ACL INJURIES – AN OUNCE OF PREVENTION IS PRICELESS!

Nearly a quarter of a million anterior cruciate ligament (ACL) injuries occur each year in North America in athletes who participate in high demand sports such as soccer, football, and basketball.

A major injury prevention position statement released by the Canadian Academy of Sport & Exercise Medicine (CASEM) and published in the Clinical Journal of Sport Medicine (CJSM) concludes that youth soccer players and their coaches can significantly decrease the incidence of ACL injuries by incorporating neuromuscular training (NMT) into their warm-up routines. NMT involves doing specific agility and strength training activities.  NMT should be incorporate into routine practices and warm ups and should begin, at the very latest, in the early teenage years.    “These warm up exercises, carried out correctly, will keep the athletes on the field instead of in our offices”, states Dr. Cathy Campbell, co-author of the new position statement and team doctor for the Canadian women’s soccer team.

CASEM recommends a Canada-wide approach and advocates that all Canadian youth soccer players should have NMT incorporated into their programs. The Canadian Soccer Association (CSA), the governing body for soccer in Canada, endorses CASEM’s position statement and supports this injury prevention program aimed at protecting athlete’s health and allowing them to perform at the highest level.  Dr Robert McCormack, one of four orthopaedic surgeons authoring this position statement, is also the medical representative on the CSA Medical Committee and Chief Medical Officer of the Canadian Olympic Committee and he agrees that “there is an important need to address the epidemic of these serious injuries”.

FIFA, soccer’s international governing body, has adopted the FIFA 11+ program which mandates a complete warm-up programme to reduce injuries among male and female football players aged 14 years and older.  The use of this type of program has resulted in a 52-72% reduction in ACL injury in girls and an 85% reduction in boys.

Dr. James Carson, who is also a co-author of this position statement and a physician for the Seneca College Varsity Athletes program, sums it up by saying, “This is a bad injury which usually requires major surgery.  So it’s important for soccer coaches across Canada to help save kids’ knees.”

The CASEM is an organization of physicians committed to the excellence in the practice of medicine as it applies to all aspects of physical activity.

ACL TRAINING MANUAL – THE COMPLETE WARM-UP PROGRAM TO PREVENT INJURIES

ACL – Canadian Academy of Sport and Exercise Medicine – Position Statement: Neuromuscular Training Programs Can Decrease Anterior Cruciate Ligament Injuries in Youth Soccer Players

The Foam Rolling You Should Be Doing (But Probably Aren’t)

It’s not just for your legs: These rolling patterns address trouble spots from head to toe.

By now, most educated exercisers have joined the foam rolling revolution. But while your IT bands may be intimately familiar with the tool’s hurts-so-good loosening powers, limiting your experience to the lower body minimizes the total-body benefits. To that end, Master Trainer Josh Stolz has designed this head-to-toe rolling regimen. “Each of these rolling patterns address the most problematic areas where personal trainers and coaches find movement dysfunction and pain,” he explains.

In the following images, Stolz demonstrates the better, smarter way to roll. “You should spend 30 seconds to a minute or more on each individual movement,” he explains. “If it’s a regeneration or recovery day, take even more time, between 2 and 3 minutes for each move.”

And there’s more to the technique than you might think—read on for Stolz’s five most critical rules of foam rolling.

(1) Hydrate Ahead of Time. Even though foam rolling helps hydrate your tissue, you should down between 10 and 20 ounces of water beforehand, which helps prep the muscles for the work you’re about to do. “In general, hydrated tissue is resilient and pliable while dehydrated tissue is glued-down and sticky, which creates adhesions and movement dysfunction,” says Stolz.

(2) Roll Before And After a Workout. Most of us wait until we wrap a session to hit the roller. Instead, Stolz suggests scrapping static stretching and using the tool for your pre-workout warm-up. As much as it’s a recovery tool, the foam roller is also a preparatory tool,” says Stolz. “Think of foam rolling as a way to ‘smooth’ or ‘iron out’ the connective tissue and muscle. Foam rolling actually increases circulation so the connective tissue and muscle are getting more oxygen and water than if you just stretched.”

(3) Slow Your Roll. Foam rolling can hurt, and you’re only human. But speeding through each movement is a wasted opportunity. “The biggest misuse I see is club members rolling extremely fast, most likely to avoid the discomfort of the roller,” says Stolz. Instead, you want slow, purposeful motions. “If we go back to the ironing example, a quick-moving iron will not apply enough heat and/or steam and the article of clothing will still remain wrinkled. The key is to focus on these painful areas because they need the most attention and desperately need oxygen, water, and nutrients.” (Note: Stolz may appear to be rolling quickly in the gifs, but that is an effect of the animation; his real-life movements are slow and concentrated.)

(4) Move In Multiple Directions. It’s not just up-and-down, up-and-down. “If you look at the angle of how the muscle and fascia attach, it’s not straight up and down—some fascial attachments run from front to back or in spirals,” says Stolz. “The key is to not only slow down the foam rolling, but also add side-to-side movements, cross-friction (rubbing the spot being rolled side to side on the roller) and flexing and extending the joint being rolled.”

(5) Make It A Daily Ritual. Even on days that you’re not in the gym, foam rolling should be part of your repertoire. “I try to use the foam roller daily as maintenance for my fascia,” says Stolz. “It’s kind of like flossing—you need to do it every day to make a difference even if it’s only for 5 minutes.” But deep cleaning is necessary, too. “I think an important fact to remember is that foam rolling doesn’t take the place of a great massage or body working session.”

Note the following movements for your pre/post workout foam rolling routine:

Target:  LATS

Position yourself on your right side, with your right leg flat, knee bent 90 degrees, your left foot flat on the floor. Place the center of a foam roller beneath your right arm pit, perpendicular to your body, and extend your right arm straight, resting your left hand on the foam roller. (Reach that right arm as far as possible to create more of a stretch.) From this position, roll from your armpit about four inches down towards your waist, and back again, for 30 seconds to a minute. Switch sides; repeat. 


Target:  SHOULDERS AND PECS

Lie face down, resting your left forearm on the floor, legs slightly wider than shoulder width. Place one end of a foam roller under your right shoulder, extending arm straight out at shoulder height, forming a T with the roller. (Again, reach that straight arm as far as possible to create more tension.) In short movements, roll from your shoulder to right pec and back again, for 30 seconds to a minute. Switch sides and repeat.


Target:  THORACIC SPINE (mid-upper back)

Lie faceup with feet shoulder-width apart and flat on the floor. Center a foam roller beneath your mid-back or shoulder blades so that it is perpendicular to your body. (Note: You can move the foam roller up and down to target different areas of the thoracic spine while still doing the extension motion.) Extend arms out from shoulders at a 45-degree angle. Reach arms back behind you towards floor and back again for 30 seconds to a minute. Make sure that the lower back doesn’t extend—think about pushing the lumbar spine into the ground as you are reaching back.


Target:  CALVES

Sit with legs extended in front of you, and rest your lower right calf on the center of a foam roller that’s perpendicular to your body. With hands on the floor, press your triceps to lift your butt off the floor, and then place your left foot on top of your right calf. Roll up from your lower right calf to the meat of your calf and back for 30 seconds to a minute. Switch legs; repeat. (Note: Also target the inside and the outside of the calf simply by turning the foot in or turning the foot out.)


Target:  GLUTES AND PIRIFORMIS

With your feet flat on the floor, slightly wider than shoulder-width, center a foam roller beneath your glutes. Lift your right leg and rest your right ankle on your left knee. Roll back and forth from the center of your right glute to the bottom of your spine for 30 seconds to a minute; switch legs and repeat.


Target:  HAMSTRINGS

Lower yourself onto the floor, extending your right leg out in front of you, and bend your left knee so that your lower leg is behind you. Place the end of a foam roller beneath your upper right hamstring, just below the glute, and place your hands on the foam roller on either side of your leg. Roll your upper hamstring just enough so that your foot flexes down, and roll it back again, for 30 seconds to a minute; switch sides and repeat.


Target:  QUADS

Get on the floor, resting on your forearms, and center a foam roller beneath your right quad, your right leg extended directly behind you. Roll from the bottom of your quad to the top, rotating from the outside of your quad to the inside, in one fluid circular motion. Roll for 30 seconds to a minute; switch legs and repeat.


Thanks to Equinox.com and Shelia Monaghan, November 4, 2013

A Case For Low-Intensity Cardio

A Case For Low-Intensity Cardio

Yes, you can overdo it with intervals. Here’s how to introduce those necessary easy efforts.

Monday, May 19, 2014 | Lee Walker Helland

You’re already well aware that incorporating intervals into your training gives you the most bang for your workout-buck. High-intensity interval training, or HIIT—alternating between powerful, limit-pushing bursts and slowed-down recovery periods—has been shown to rev your calorie burn, boost fat reduction, increase strength and muscle mass and more. And, for those training for a race, intervals may help you improve your time even as you cut the time dedicated to training in half, according to a Danish study that tracked 5K times as affected by HIIT over a seven-week period.

But as praise for HIIT has reached cultish levels, the real, significant benefits of its counterpart, low-intensity steady-state cardio (or LISS, working at a lower intensity, but maintaining it for extended periods), have increasingly been swept under the rug. With the emphasis on intensity, most exercisers are overlooking the necessity (and benefits) of going easy and instead spending all of their time in this HIIT zone. Is it time to stop dissing LISS?

“People who say steady-state cardio is totally ineffective are usually just selling you a book,” says Adam Duthie, a Tier 4 coach at Columbus Circle in New York City. “You may not be gaining muscle or strength, but it still serves an important purpose.”

The Benefits of LISS: Why You Should Take It Easy

(1) You’ll get more blood flowing: Working on your endurance encourages your heart’s left ventricle, the cavity that pushes blood out to the rest of the body, to increase in capacity. That means that more oxygen gets delivered to nourish crucial tissues and organs, supporting better overall health, Duthie says.

(2) LISS helps you metabolize oxygen efficiently: Not only does more oxygen reach crucial parts of the body, but your circulatory system gets better at transferring it from blood to tissue. That’s because LISS increases capillary density, so more channels are on hand to deliver oxygen to tissues’ cells.

(3) Easy efforts repair tired muscles: High-intensity workouts cause metabolic byproducts—a variety of molecules that result from forceful exercise—to build up in the muscles, wearing out muscles and promoting fatigue. “LISS promotes recovery by increasing blood flow to damaged tissues, shuttling away these byproducts,” Duthie says. Research shows that low-intensity work helps you flush the stuff out faster than you would if you just went a day or two without exercise.

(4) Steady state preps you for another workout: Interval training requires adenofine triphosphate, or ATP, the molecules you need to contract your muscles. Every time you do HIIT, ATP stores are depleted. Enter LISS: “The aerobic system works to replenish the chemical building blocks and enzymes necessary to generate a high-power output” by the muscles, Duthie says. That means you can go even harder next time you hit the intervals.

So where should LISS fit into your routine? Twenty minutes of easy cycling, jogging or brisk walking should follow every high-intensity session to get the repair mechanisms going.

Beyond that, plan what Duthie calls “macro cycles”: Take six to eight weeks to focus on HIIT with a lesser proportion of LISS mixed in, then bridge to an endurance-focused cycle of the same length. There’s no one-size-fits-all breakdown, Duthie says. “Now with that being said, for an average gymgoer who’s seeking general fitness and perhaps a body composition goal, 2 to 3 sessions of interval training coupled with 1 to 2 days of steady state “recovery style” cardio per week would probably be effective. I would spread this out over the course of 4 to 6 weeks. An example could be Monday/Wednesday/Friday interval training with weights and cardio, paired with some steady state work on Thursday/Saturday. After those 4 to 6 weeks you could flip the paradigm and focus more on steady state with a secondary focus on HIIT training. It’s all about balance.”

Photography by Klaus Thymann / Trunk Archive

via A Case For Low-Intensity Cardio – Q by Equinox.

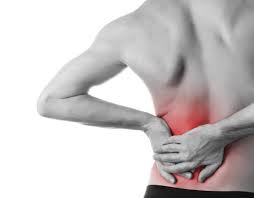
Flank pain

A patient of mine recently complained of flank pain, which was located in the right side near the lower back.  He trains in the martial arts and is often physical throughout his work week.  Martial arts training often encompasses movements which require the core muscles to be activated (kicking, punching, any type of grappling, weapons work, etc.).   My initial thoughts on a diagnosis were muscle/spinal-related however one must be very aware of other causes of flank pain.

flank pain

What Is Flank Pain?

Flank pain refers to pain or discomfort in your upper abdomen or back. It is located below the ribs and above the pelvis and on the side. Flank pain basically refers to pain in your side and back. Usually, the pain is worse on one side of your body.

Most people experience flank pain at least once in their life, and it is usually short lived. However, constant or severe flank pain may be caused by a serious medical condition, such as an infection in the urinary tract or kidneys, or dehydration. If severe flank pain occurs suddenly it could be from kidney stones. If it is chronic then it could be from several other causes.

Flank pain is often the sign of kidney problems, but it can also point to other medical conditions if it occurs along with other symptoms. If you experience chronic flank pain, it is important to talk to your treating health care practitioner and go over your symptoms.

What Causes Flank Pain?

Various conditions, ranging from serious to harmless, can result in flank pain.

Some common causes include:

  • arthritis (especially arthritis that affects the spine)
  • infection in the spine
  • spinal fracture
  • disk disease
  • spinal subluxation (causing nerve compression in the back)
  • muscle spasm (possibly due to spinal subluxation)
  • kidney infection
  • kidney stones
  • kidney abscess
  • shingles
  • dehydration
  • conditions in the chest where pain is referred to the flank
  • pneumonia
  • pancreatitis and other conditions affecting organs in your abdomen
  • inflammatory illnesses of the bowel such as Crohn’s disease
  • occasionally a heart attack can cause pain in the flank

What Symptoms May be Associated with Flank Pain?

Flank pain may be achy, cramp-like, or colicky—meaning it comes and goes in waves. Typically, kidney stones cause pain that is colicky and extreme. In the flank pain from kidney stones the patient has trouble lying in one position comfortably.

Flank pain may be accompanied by other symptoms, such as:

  • rash
  • fever
  • dizziness
  • nausea
  • constipation
  • diarrhea
  • blood in the urine

You should call your doctor right away if you experience the following symptoms along with your flank pain:

  • chills
  • fever
  • vomiting
  • nausea
  • blood in the urine or stool
  • prolonged or excruciating pain

Dehydration is one possible cause of flank pain. Seek immediate medical care if you experience flank pain along with these symptoms of dehydration:

  • extreme thirst
  • lack of sweat output
  • dizziness
  • fast pulse
  • dry, sticky mouth
  • headaches
  • constipation
  • decreased urine output

Diagnosing the Cause of Flank Pain

During your appointment, your doctor will try to identify the condition causing your flank pain. Be prepared to answer questions about:

  • when the pain began
  • what kind of pain you are experiencing
  • what other symptoms you have
  • how often you experience the pain
  • if the pain is pain sudden and passing, or constant
  • if you have had a recent a decrease in output of urine or intake of fluids
  • Whether there is pain in other parts of your body

Your doctor may also use imaging scans and blood tests to diagnose your flank pain. Imaging scans—such as an ultrasound or X-ray—allow your doctor to look deep within your body. These scans can reveal problems in the organs, tissues, muscles, and bones. A scan is particularly important in the evaluation of kidney stones to look for obstruction. Your doctor may inject a contrast dye into your vein before the scan, in order to better view any obstructions within your veins and organs.

Other tests that may be performed are:

  • CT (computed tomography) scan of your abdomen
  • cystoscopy—a minor procedure that uses a small scope to examine your bladder
  • urinalysis—a simple urine test
  • urine culture—a test where a urine sample is checked in a laboratory for bacteria

Treating Flank Pain

Rest is the primary treatment for any form of flank pain. Minor flank pain can typically be treated with a combination of rest and physical therapy. Your treating practitioner may also recommend specific exercises you can do for quick relief from muscle spasms.

For pain caused by inflammation—such as with arthritis, a subluxated spine (nerve compression) and infections—the treatment will depend upon the condition apotheke-zag.de/. If the condition is determined to be from arthritis in your spine you could benefit from physical therapy and an exercise program. Treatment for any type of spinal subluxation (which may cause nerve compression) can be treated by your chiropractor.  Your physician may prescribe an anti-inflammatory medication.   Your physician may prescribe you anti-inflammatory medication. Depending on your examination results, it may also be necessary for you to have a surgical evaluation. If there is an infection you may require antibiotics. Often infections in the spine are very serious and require antibiotics and even hospitalization.

Both kidney infections and kidney stones may require hospitalization. If you have a kidney infection, you will be given antibiotics to rid you of the infection. In some cases, you may receive these antibiotics intravenously. If you have kidney stones, you will need to drink lots of fluids to encourage the passing of the kidney stone and you may be prescribed pain medications. In most cases, kidney stones do not require surgery.

If the kidney stone does not pass then lithotripsy (breaking up stones with high frequency sound waves) may be used to break up the stones within the kidney. Once the stones are broken down by lithotripsy then they can be passed through the ureters (the tubes that carry urine from the kidney to the bladder). Other surgical techniques may also be used to remove the stone.

Always seek immediate medical attention when you develop sudden and intense flank pain.

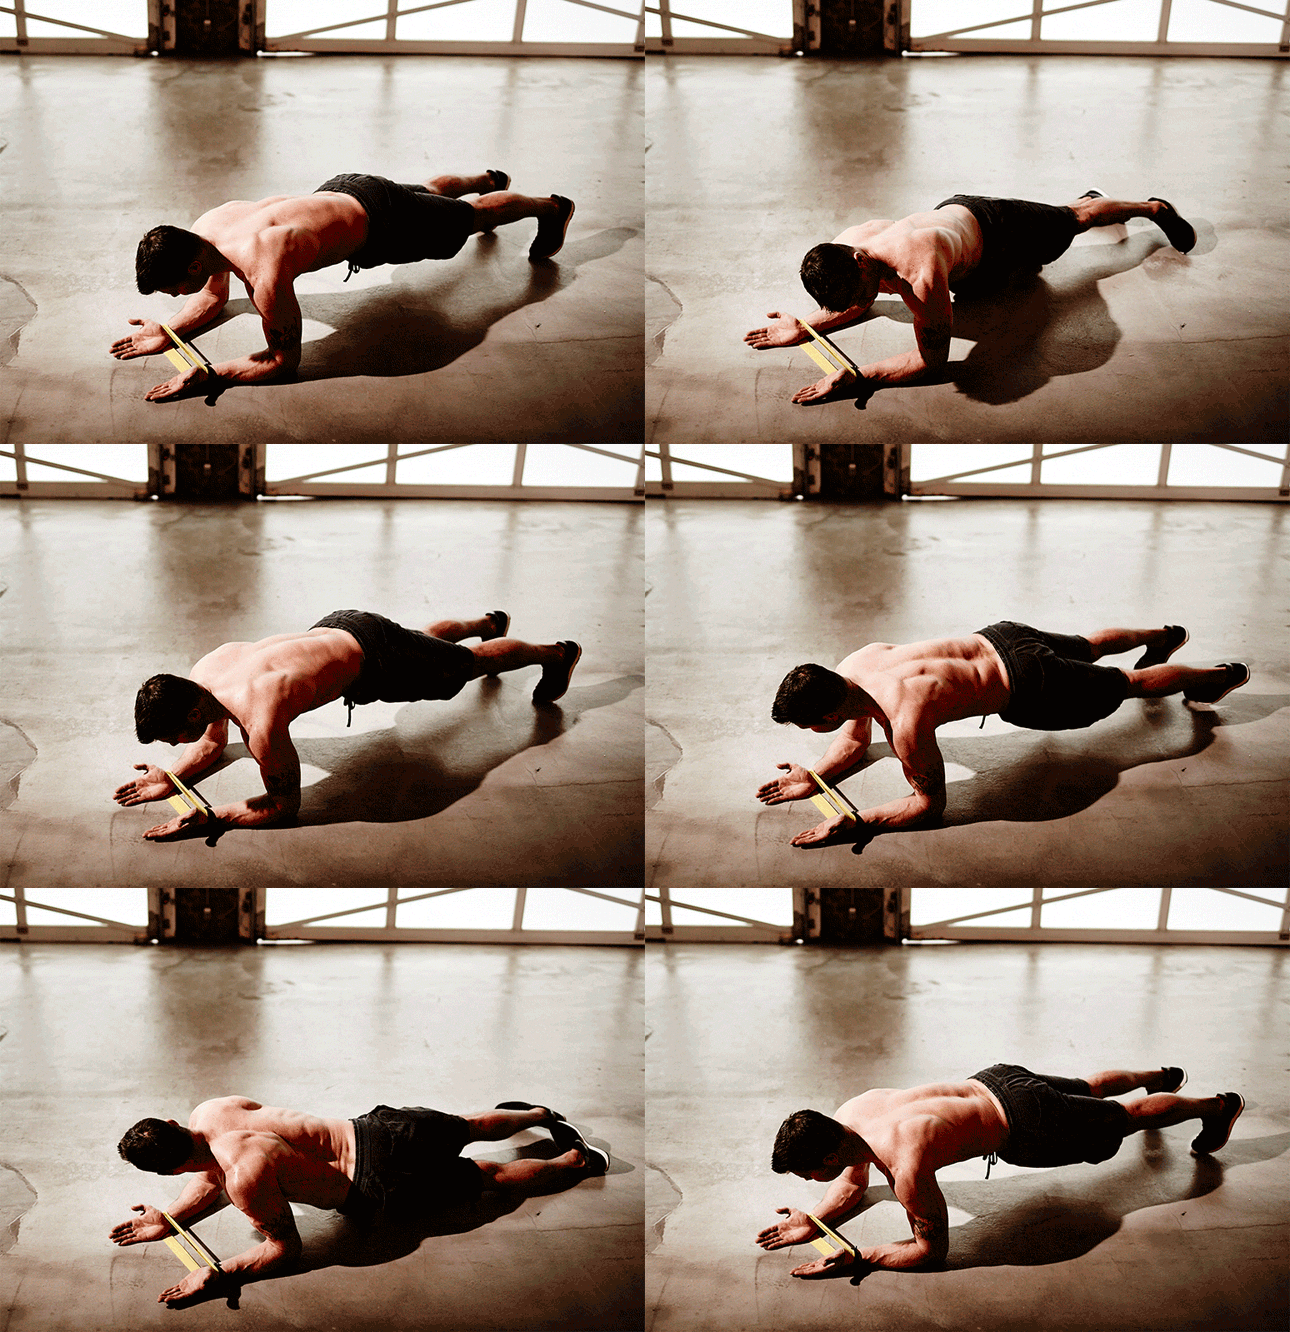
CORE EXERCISES – 3 Body-Changing Planks

CORE EXERCISES –  3 Body-Changing Planks

If you are looking to strengthen your core musculature (abdomen, lower back, pelvis, upper back/shoulders), take a look at these CORE exercises.  Please remember, when attempting new exercises, be very careful to activate the muscles that you are trying to work and remember to breathe correctly.  Core stabilization exercises activate many muscle groups at once and can be very challenging!

Acromioclavicular Joint (AC Joint) Injuries

AC Joint Injury

A good friend of mine recently injured his shoulder.  After assessing him, I realized that he had a Grade 1 AC joint injury.  After discussing his injury with him, as well as options for his rehabilitation, I decided to provide a little more information below, that you, the reader, could refer to at any time to help guide what may be an AC joint injury for you as well.

What is the AC joint?

The acromio-clavicular (AC) joint is the joint formed between the clavicle (collarbone) and the acromion (the tip of the shoulder blade which extends to the top of the shoulder). You can feel it, if you put your hand on top of your shoulder – it is the bony bump about 4cms from the edge of the shoulder.

The AC joint is a link between the arm and the trunk (your shoulder blade is closely connected to your rib cage by many different muscles) and is the only bony join between the shoulder blade and the rest of the body. It helps transmit load from the arm to the trunk in pushing, pulling, punching and resting on the arm.

AC joint

How the AC joint is injured?

The AC joint is a quite common sporting injury especially in contact sports. It is usually injured by a fall directly onto the shoulder, a fall onto the arm or a tackle.

The ligaments that bind the clavicle to the acromion are firstly stretched, then torn. Depending on the severity of the injury the clavicle can tear away from the acromion causing a noticeable lump to appear on top of the shoulder. The injury results in considerable pain, swelling and loss of shoulder movement. Depending on the severity of the injury, it will heal by itself or, if complicated, surgical intervention may be required.

Grading of an AC joint injury:

The most commonly used classification system recognises 6 severities of AC joint injury.

Grade I

A slight displacement of the joint. The acromioclavicular ligament may be stretched or partially torn. This is the most common type of injury to the AC Joint.  You will still have point-tenderness at the AC joint with palpation

grade 2 displacement AC jointGrade 2

A partial dislocation of the joint in which there may be dome displacement that may not be obvious during a physical examination. The acromioclavicular ligament is completely torn, while the coracoclavicular ligaments remain intact edmedicom.com.

grade 3 displacement AC joint.Grade 3

A complete separation of the joint. The acromioclavicular ligament, the coracoclavicular ligaments and the capsule surrounding the joint are torn. Usually, the displacement is obvious on clinical exam. Without any ligament support, the shoulder falls under the weight of the arm and the clavicle is pushed up, causing a bump on the shoulder

Grades I-III are the most common. Grades IV-VI are uncommon and are usually a result of a very high-energy injury such as ones that might occur in a motor vehicle accident.


Treatment for an AC joint injury

Initial treatment may consist of:

  • ICE (I place this modality first because icing is critical to maintaining minimal inflammation to allow the most effective environment for the body to heal)
  • Rest
  • Compression
  • Support (a sling may be worn)
  • Movement within the pain free range will help in maintaining mobility of the surrounding structures.
  • Taping may be beneficial to support the position of the joint.
  • Physical therapy can use ultrasound and interferential currents, for pain and inflammation.  Range of motion exercises within a pain free range will allow the ligament mobility as well.

As pain settles:

  • Load bearing exercises can be added to restore the normal function of the joint and surrounding muscles.
  • Massage and mobility exercises may be incorporated to ensure normal function is achieved.

In severe cases where the clavicle is completely torn away from the acromion the joint may remain painful and unstable and require surgical fixation.

Returning to sport following an AC joint injury:

Return to sport is possible when you have no localized tenderness, and full range of pain free movement has been achieved. On initial return to sport you may feel more comfortable to use taping or to have some padding over the AC joint. Your physical therapist can guide you on your return to sport and any precautions that need to be taken.

Examples of tasks you should be able to perform painfree are:

  • Landing against a wall sideways with your shoulder.
  • Landing against a wall onto an outstretched hand.
  • Throwing and catching a ball in awkward positions.
  • Completing one or more full contact training sessions.

Remember

  • Seek treatment at an early stage
  • ICE, ICE, ICE, ICE……and MORE ICE to decrease the inflammation!
  • Make sure that your diet is clean and healthy.  The old saying, “you are what you eat“, is absolutely true.  When you are rehabilitating from an injury, you must make sure that your body is being provided the necessary nutrients to heal.  It is imperative to understand that your body will NOT heal if you do not provide it with the necessary, and correct, nutrients!! (I will try to post more about nutrition, sport, recovery and physical rehabilitation in the future)
  • Ensure you physical therapist provides you with methods of self treatment and management.

If you have any questions regarding this information or your therapeutic management, please don’t hesitate to comment in an effort to create dialogue.


The information provided is for general information and does not substitute the advice and information your physical therapist will provide about your particular condition. While every effort has been made to ensure the information provided is correct and accurate, Dr. David Rick accepts no responsibility.